Select Your Region
Region-Based Optimized Content
Sanity CMS Contact Form Integration in 2026 | Step-by-Step Guide
Learn how to integrate a contact form with Sanity CMS. step-by-step guide covers setup, configuration & best practices to connect forms seamlessly with Sanity backend

Jaswinder Singh
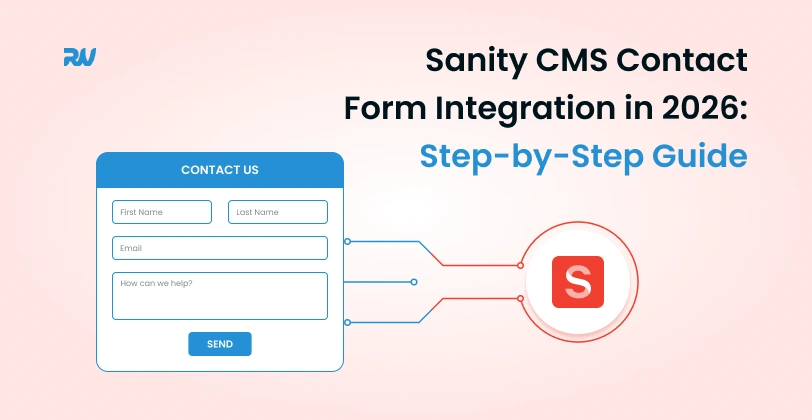
In the dynamic landscape of modern web development, user interaction is paramount. A contact form is not just a mere element on a website; it's a critical gateway for lead generation, customer support, and direct communication. For businesses leveraging a headless CMS like Sanity, integrating a robust and secure contact form is essential for capturing valuable user data and fostering engagement. This guide will provide a clear, step-by-step approach to Sanity CMS contact form integration in 2026, covering everything from project setup and schema definition to frontend integration and secure data handling.
As a leading IT agency specializing in Headless Solutions and Jamstack development, RW Infotech understands the nuances of creating high-performance, scalable web experiences. We'll demystify the process, offering practical insights, code examples, and best practices to ensure your Sanity-powered website effectively collects and manages user submissions. Whether you're a developer, content manager, or business owner, this article will equip you with the knowledge to implement a seamless and efficient contact form solution.
Understanding Headless CMS and Contact Forms
Before diving into the technicalities, let's establish a foundational understanding of the key concepts at play. A headless CMS like Sanity separates the content management backend from the frontend presentation layer. This architecture offers unparalleled flexibility, allowing developers to use their preferred frameworks (React, Next.js, Vue, Svelte, etc.) while content editors manage data centrally. Contact forms, in this context, become a mechanism to push user-generated data back into the CMS or a related service.
The primary benefit of integrating a contact form with Sanity is the ability to centralize form submissions alongside your other content. This means marketing teams can easily access, review, and manage leads or inquiries directly within the Sanity Studio, streamlining workflows and improving data governance. It also opens up possibilities for content-driven automation, where form submissions can trigger specific actions or content updates.
Setting Up Your Sanity Project for Form Data
The first step in any Sanity CMS integration involves preparing your backend. This section details how to set up your Sanity project and define the schema for your contact form submissions.
Initializing Your Sanity Project
If you don't already have a Sanity project, you can create one using the Sanity CLI. Open your terminal and run:
npm install -g @sanity/cli
sanity initFollow the prompts to create a new project, select a schema template (e.g., "Clean project with no predefined schemas"), and choose your preferred dataset configuration. This will set up your Sanity Studio, which is where you'll define and manage your content schemas.
Defining the Contact Form Submission Schema
To store contact form data, you need to define a document type in your Sanity schema. This schema will dictate the structure of each submission. Navigate to your Sanity project's schemas directory (e.g., ./schemas/) and create a new file, for instance, submission.js.
Here’s an example of a basic contact form submission schema:
// schemas/submission.js
export default {
  name: 'submission',
  title: 'Form Submission',
  type: 'document',
  fields: [
    {
      name: 'name',
      title: 'Name',
      type: 'string',
      validation: Rule => Rule.required()
    },
    {
      name: 'email',
      title: 'Email',
      type: 'string',
      validation: Rule => Rule.required().email()
    },
    {
      name: 'subject',
      title: 'Subject',
      type: 'string',
    },
    {
      name: 'message',
      title: 'Message',
      type: 'text',
      validation: Rule => Rule.required()
    },
    {
      name: 'sourcePage',
      title: 'Source Page',
      type: 'string',
      description: 'The URL of the page where the form was submitted.'
    },
    {
      name: 'submittedAt',
      title: 'Submitted At',
      type: 'datetime',
      options: {
        dateFormat: 'YYYY-MM-DD',
        timeFormat: 'HH:mm',
        calendarTodayLabel: 'Today'
      },
      readOnly: true // This field will be set programmatically
    }
  ],
  preview: {
    select: {
      name: 'name',
      email: 'email',
      subject: 'subject',
      submittedAt: 'submittedAt'
    },
    prepare(selection) {
      const {name, email, subject, submittedAt} = selection
      return {
        title: `${name} (${email})`,
        subtitle: `${subject || 'No Subject'} - ${new Date(submittedAt).toLocaleDateString()}`
      }
    }
  }
}After creating this file, remember to add it to your schema.js file (typically ./schemas/schema.js) within the types array:
// schemas/schema.js
import schemaTypes from 'all:part:@sanity/base/schema-type'
import createSchema from 'part:@sanity/base/schema-creator'

import submission from './submission' // Import your new schema

export default createSchema({
  name: 'default',
  types: schemaTypes.concat([
    submission, // Add it to the array
    // ... other schemas
  ]),
})Run sanity start in your studio directory to see the new "Form Submission" document type available in your Sanity Studio. This completes the backend setup for receiving form data.
Frontend Integration: Building Your Contact Form
With the Sanity backend ready, the next step is to build the actual contact form on your frontend. This guide will use React/Next.js as an example, but the principles apply to any modern JavaScript framework.
Creating the Form Component
First, create a simple React component for your contact form. This component will handle form state, input changes, and the submission logic.
// components/ContactForm.js (Example for React/Next.js)
import React, { useState } from 'react';

const ContactForm = () => {
  const [formData, setFormData] = useState({
    name: '',
    email: '',
    subject: '',
    message: '',
  });
  const [status, setStatus] = useState(''); // 'idle', 'loading', 'success', 'error'

  const handleChange = (e) => {
    setFormData({ ...formData, [e.target.name]: e.target.value });
  };

  const handleSubmit = async (e) => {
    e.preventDefault();
    setStatus('loading');

    try {
      const response = await fetch('/api/submit-form', { // Your API endpoint
        method: 'POST',
        headers: {
          'Content-Type': 'application/json',
        },
        body: JSON.stringify({
          ...formData,
          sourcePage: window.location.href, // Capture source page
        }),
      });

      if (response.ok) {
        setStatus('success');
        setFormData({ name: '', email: '', subject: '', message: '' }); // Clear form
      } else {
        const errorData = await response.json();
        setStatus(`error: ${errorData.message || 'Unknown error'}`);
      }
    } catch (error) {
      console.error('Submission error:', error);
      setStatus(`error: ${error.message}`);
    }
  };

  return (
    <form onSubmit={handleSubmit} className="contact-form">
      <div>
        <label htmlFor="name">Name:</label>
        <input
          type="text"
          id="name"
          name="name"
          value={formData.name}
          onChange={handleChange}
          required
        />
      </div>
      <div>
        <label htmlFor="email">Email:</label>
        <input
          type="email"
          id="email"
          name="email"
          value={formData.email}
          onChange={handleChange}
          required
        />
      </div>
      <div>
        <label htmlFor="subject">Subject:</label>
        <input
          type="text"
          id="subject"
          name="subject"
          value={formData.subject}
          onChange={handleChange}
        />
      </div>
      <div>
        <label htmlFor="message">Message:</label>
        <textarea
          id="message"
          name="message"
          value={formData.message}
          onChange={handleChange}
          required
        />
      </div>
      <button type="submit" disabled={status === 'loading'}>
        {status === 'loading' ? 'Submitting...' : 'Send Message'}
      </button>

      {status === 'success' && <p className="success-message">Thank you for your message!</p>}
      {status.startsWith('error') && <p className="error-message">{status}</p>}
    </form>
  );
};

export default ContactForm;This component captures user input and, upon submission, sends a POST request to a backend API endpoint (/api/submit-form). This endpoint will be responsible for interacting with Sanity.
Handling Form Submissions with an API Route
Directly exposing your Sanity API credentials on the frontend is a security risk. Instead, we'll create an API route (e.g., a Next.js API route or a serverless function) that acts as an intermediary, securely handling the interaction with Sanity.
Creating the API Route for Sanity Integration
For Next.js, create a file like pages/api/submit-form.js. This file will contain the logic to receive form data, validate it (optional but recommended), and then send it to Sanity.
// pages/api/submit-form.js (Example for Next.js API Route)
import sanityClient from '@sanity/client';

// Initialize Sanity client with your project details
// IMPORTANT: Use environment variables for these credentials in production!
const client = sanityClient({
  projectId: process.env.NEXT_PUBLIC_SANITY_PROJECT_ID,
  dataset: process.env.NEXT_PUBLIC_SANITY_DATASET,
  apiVersion: '2023-01-01', // Use a consistent API version
  token: process.env.SANITY_WRITE_TOKEN, // A token with write permissions
  useCdn: false, // Don't use CDN for writes
});

export default async function handler(req, res) {
  if (req.method !== 'POST') {
    return res.status(405).json({ message: 'Method Not Allowed' });
  }

  const { name, email, subject, message, sourcePage } = req.body;

  // Basic server-side validation (enhance as needed)
  if (!name || !email || !message) {
    return res.status(400).json({ message: 'Name, email, and message are required.' });
  }

  try {
    const submission = {
      _type: 'submission', // Matches your Sanity schema document type name
      name,
      email,
      subject: subject || 'No Subject',
      message,
      sourcePage: sourcePage || 'Unknown',
      submittedAt: new Date().toISOString(),
    };

    const result = await client.create(submission);

    console.log('Form submission successful:', result);
    return res.status(200).json({ message: 'Form submitted successfully!', id: result._id });
  } catch (error) {
    console.error('Error submitting form to Sanity:', error);
    return res.status(500).json({ message: 'Failed to submit form.', error: error.message });
  }
}Security Note: It is absolutely crucial to use environment variables for your Sanity API token (SANITY_WRITE_TOKEN). This token grants write access to your Sanity project, so it must never be exposed on the client-side. For Next.js, NEXT_PUBLIC_ variables are exposed to the browser, while others are server-side only. Your SANITY_WRITE_TOKEN should not start with NEXT_PUBLIC_.
Generating a Sanity Write Token
To get a SANITY_WRITE_TOKEN, navigate to your Sanity project dashboard (manage.sanity.io), go to "Settings" -> "API" -> "Tokens". Create a new token and ensure it has "Editor" permissions (or at least "Create" and "Update" for your submission document type). Copy this token and add it to your .env.local file in your Next.js project:
# .env.local
NEXT_PUBLIC_SANITY_PROJECT_ID="your-project-id"
NEXT_PUBLIC_SANITY_DATASET="your-dataset-name"
SANITY_WRITE_TOKEN="your-generated-sanity-write-token"Restart your development server after adding environment variables.
Advanced Considerations and Best Practices
While the basic integration is now complete, there are several advanced considerations to enhance your
Spam Protection
Contact forms are prime targets for spam. Implement measures like reCAPTCHA (v2 or v3) or hCaptcha on your frontend. The API route should then verify the reCAPTCHA token before processing the submission to Sanity. This adds a crucial layer of defense against automated bots.
// Example: reCAPTCHA verification in your API route
// (Requires installing a package like 'google-recaptcha-verify' or similar)
const verifyRecaptcha = async (token) => {
  const response = await fetch(`https://www.google.com/recaptcha/api/siteverify?secret=${process.env.RECAPTCHA_SECRET_KEY}&response=${token}`, {
    method: 'POST',
  });
  const data = await response.json();
  return data.success;
};

// ... inside your API route handler
const { name, email, subject, message, sourcePage, recaptchaToken } = req.body;

if (!recaptchaToken || !(await verifyRecaptcha(recaptchaToken))) {
  return res.status(400).json({ message: 'reCAPTCHA verification failed.' });
}
// ... proceed with Sanity submissionRemember to get a reCAPTCHA secret key and add it to your server-side environment variables.
Email Notifications
Storing submissions in Sanity is excellent for management, but you'll likely want to receive immediate email notifications. Integrate a transactional email service like SendGrid, Mailgun, or Nodemailer (with an SMTP service) into your API route. After successfully writing to Sanity, trigger an email send to your team.
// Example: Sending an email after Sanity submission (using Nodemailer)
import nodemailer from 'nodemailer';

const transporter = nodemailer.createTransport({
  host: process.env.EMAIL_HOST,
  port: process.env.EMAIL_PORT,
  secure: process.env.EMAIL_SECURE === 'true', // Use 'true' for 465, 'false' for other ports
  auth: {
    user: process.env.EMAIL_USER,
    pass: process.env.EMAIL_PASS,
  },
});

// ... inside your API route, after client.create(submission)
try {
  await transporter.sendMail({
    from: process.env.EMAIL_FROM,
    to: process.env.EMAIL_TO, // Your recipient email
    subject: `New Form Submission: ${subject}`,
    html: `
      <p><strong>Name:</strong> ${name}</p>
      <p><strong>Email:</strong> ${email}</p>
      <p><strong>Subject:</strong> ${subject}</p>
      <p><strong>Message:</strong> ${message}</p>
      <p><strong>Source Page:</strong> ${sourcePage}</p>
      <p><strong>Submitted At:</strong> ${new Date().toLocaleString()}</p>
    `,
  });
  console.log('Notification email sent successfully.');
} catch (emailError) {
  console.error('Error sending notification email:', emailError);
}
Ensure all email service credentials are kept in server-side environment variables.
Data Validation and Sanitization
Always validate and sanitize user input on both the client-side (for better UX) and, more importantly, the server-side (for security). Use libraries like yup or zod for robust schema validation in your API routes. Sanitize inputs to prevent XSS attacks by escaping HTML or using a library like dompurify if you intend to display the raw input.
Error Handling and Logging
Implement comprehensive error handling in your API routes and frontend. Log errors to a service like Sentry or LogRocket for easier debugging and monitoring. Provide clear, user-friendly error messages on the frontend without exposing sensitive backend details.


Hi, my name is Jaswinder, let's talk about your business needs.
I will do my best to find a reliable solution for you!
Performance Optimization for Forms
For high-traffic forms, consider optimizing the submission process. This might involve asynchronous processing of submissions (e.g., using a queue service like AWS SQS or Google Cloud Pub/Sub) to decouple the form submission from the Sanity write operation and email sending. This ensures a fast response to the user even if external services are slow.
Conclusion
Integrating a contact form with Sanity CMS in 2026 is a straightforward yet powerful way to enhance user engagement and streamline data management. By carefully defining your schema, building a secure API endpoint, and implementing best practices for validation, spam protection, and notifications, you can create a robust and efficient system for collecting valuable user information. This approach not only centralizes your form submissions within a flexible headless CMS but also leverages the performance and scalability benefits of modern web architectures like Jamstack.
At RW Infotech, we specialize in crafting bespoke Headless Solutions and Jamstack websites that empower businesses. Our expertise in Sanity CMS migrations, full-stack development, and AI automation allows us to design and implement sophisticated contact form integrations that are not only secure and performant but also tailored to your specific business needs. Whether you require advanced spam protection, custom data workflows, CRM integrations, or comprehensive digital marketing strategies for your headless site, our team is equipped to deliver. Partner with RW Infotech to transform your website's user interaction into a seamless, data-driven experience that fuels your growth.
Frequently Asked Questions
Find answers to the most common questions about Sanity CMS Contact Form Integration.
Storing submissions in Sanity CMS offers several key advantages: centralized content management, allowing content editors to manage form data alongside other website content; customizable data structures tailored to your specific form fields; version control for submissions; and the ability to leverage Sanity's powerful query API for advanced filtering and reporting. While external services like Formspree or Netlify Forms are quick for basic setups, Sanity provides greater control, flexibility, and integration depth within your existing content ecosystem.
The primary method to ensure the security of your Sanity write token is to keep it strictly on the server-side. Never expose it in your frontend code. When using frameworks like Next.js or Nuxt.js, create an API route or serverless function that acts as a secure intermediary. This server-side function will initialize the Sanity client using the token, which is stored as an environment variable (e.g., SANITY_WRITE_TOKEN). This prevents malicious actors from accessing your token and potentially manipulating your Sanity project data.
Absolutely. One of the significant advantages of a headless architecture is its extensibility. After successfully submitting data to Sanity via your API route, you can extend that same API route to push the data to other services. For CRM integration (e.g., Salesforce, HubSpot), you would use their respective APIs to create new leads or contacts. For marketing automation (e.g., Mailchimp, ActiveCampaign), you could add the submitter's email to a list or trigger a specific automation workflow. This multi-step process ensures data consistency across your tech stack.
For file uploads, you would extend your Sanity schema to include an image or file type. On the frontend, the form would handle file selection, and your API route would then be responsible for uploading the file to Sanity (using client.assets.upload) and linking the asset to your submission document. For conditional logic, this is primarily a frontend concern. Your React/Next.js component would manage state to show/hide fields based on user input. The backend API route simply receives the final set of data, which might vary based on the user's conditional choices.
While Sanity is highly scalable, direct writes from high-traffic forms can sometimes lead to rate limiting or slight delays if your API route performs many synchronous operations (e.g., Sanity write + email send + CRM update). For extreme cases, consider implementing a message queue (e.g., RabbitMQ, AWS SQS, Google Cloud Pub/Sub) in your API route. The API route would quickly publish the form data to the queue, immediately responding to the user. A separate worker process would then asynchronously consume messages from the queue and perform the Sanity write, email sending, and other integrations, ensuring a fast user experience without blocking the submission process.
News & Insights
We like to share our thoughts on topics we find inspiring. Explore our news and insights.


REST vs GraphQL in Builder.io Content API: A Complete Comparison Guide
A complete comparison guide to REST vs GraphQL in Builder.io Content API. Learn performance differences, caching strategies, developer experience, real-world use cases, and how to choose the right API approach for scalable, high-performance digital experiences.


How to Build Advanced AI Marketing Reporting Systems with Sanity Content Lake
Learn how to build advanced AI marketing reporting systems using Sanity Content Lake. This guide explains how to centralize marketing data, integrate AI-powered analytics, generate real-time insights, build predictive models, and create dynamic dashboards that help marketing teams optimize campaigns, improve decision-making, and maximize ROI.